Nintendo Switch Pro Controller Diagram
Nintendo Switch Pro Controller front view:
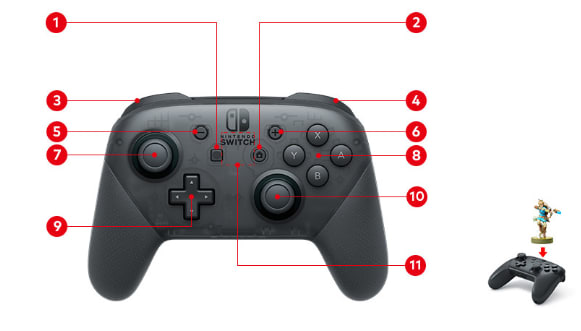
Capture Button
Takes a screenshot during playHOME Button
Suspends the current software and opens the HOME Menu. The HOME Button blinks when you have a notification.L Button
R Button
- Button
+ Button
Left Stick
Functions as a button when pressed down.A/B/X/Y Buttons
+Control Pad
Right Stick
Functions as a button when pressed down.NFC touchpoint
You can touch amiibo here to read and write data on them.
Nintendo Switch Pro Controller back view:
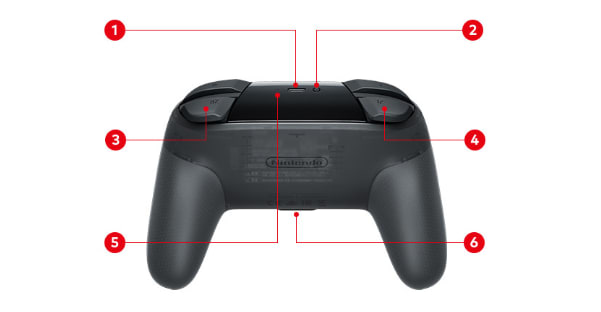
USB Type-C™ Connector
You can use the enclosed USB charging cable to pair the controller with the console or to charge it. You can also connect it directly to an AC adapter.SYNC Button
Used to pair the controller and reset the wireless connection with the console.ZR Button
ZL Button
Recharge LED
Lights up when the controller is charging.Player LED
Located on the bottom of the controller. It indicates your player number.